The lazy bag, what is it used for ?
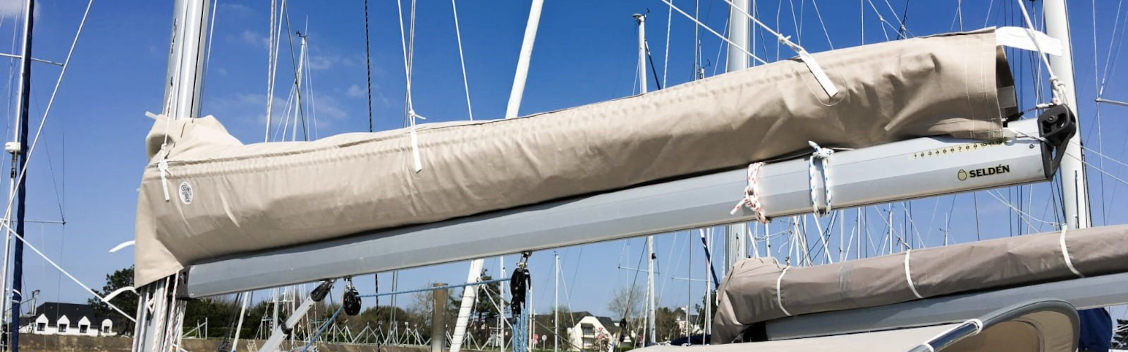
The lazy bag In navigation, it is a marvel of practicality, allowing you to lower the mainsail of your sailboat without it scattering across the deck, making it easier to store on the boom. The sail is held as if in a cradle.
This easy operation requires that you install the lazy bag.
Installation Requirements
- Taking measurements of your lazy bag
The task is very easy; you will need a tape measure, a pencil, a rope, and our double-sided measurement sheet template.
Unroll the tape measure on the deck and take the end (rope) in hand.
Start with measurement A, which indicates the circumference of the mast. Wrap the rope around the mast. Hold the mark by pinching the rope with your finger and transfer it to the measuring tape to obtain the length.
The B measurement indicates the distance between the back of the mast and the end of the headboard. Take the tape measure and record this measurement.
The C measurement indicates the circumference of the sail 30 cm from the clew. Measure 30 cm from the clew at the end of the boom and take the perimeter of the sail using the rope. The perimeter is measured above the boom; the boom is never included in the measurement. Transfer the length of the rope onto the tape measure laid out on the deck.
We do not compress the sail, otherwise the lazy bag will be too tight.
And do the same for the following dimensions:
To make the task easier for you, first mark the distances on the boom using a pencil line and a measuring tape.
The D measurement indicates the circumference of the sail at the middle of the boom.
The E measurement indicates the circumference of the sail 1 meter from the back of the mast.
The F dimension indicates the circumference of the sail 50cm from the back of the mast.
The G measurement indicates the circumference of the sail, including the headboard at the back of the mast.
To take these measurements, it is no longer necessary to use a rope, also called a line, as there is no longer a circumference to measure but only a tape measure.
The H dimension indicates the distance from the back of the mast to the ring or eyelet of the clew. Make sure to fully cover the clew ring. Ample coverage is recommended if possible and desired.
The I measurement indicates the distance between the back of the mast and the first reef point. We make interruptions in the bolt rope to allow you to pass your reefs through. The first reef is the one closest to the clew.
The J measurement indicates the distance between the back of the mast and the second reef.
The K dimension indicates the distance between the back of the mast and the 3rd reef point, if you have one; otherwise, leave this field blank.
The L dimension indicates the length of the mast foot, that is, from the back of the mast to the start of the groove. This measurement is quite little known, and it typically ranges from 15 to 20 cm.
The last measurement is the M measurement, which indicates the distance between the top of the boom and the top of the headboard that includes a ring or eyelet through which the mainsail halyard passes.
If you are unable to take the measurements of your sail, please note that we offer The lazy bag STANDARD which is available in several sizes and allows you to protect your sail.
- Choose the right one lazy bag and its lazy jacks
The measurement sheet will need to include the number of lazy jacks your boat is equipped with or will be equipped with. Three or four for pleasure boats.
And check whether your sail has a loose foot or a bolt rope. It is called loose when you can insert the bolt rope of the lazy bag in the boom track. This is the most common case. If it is the sail's bolt rope that is in the boom track, it is called a bolt-rope sail, and you need to choose the "sail with a rope-edge" option.
- Others lazy bag, we call them the lazy bag Custom
These lazy bag are designed based on the owner's sailing habits, the boat's configuration, and the sailing area.
We can mention the lazy bag custom with boom vang. We will continue to showcase the different types of lazy bag custom.
Presentation of the lazy bag for spreader boom.
Installation Steps
- Preparation of the sail to be protected
1. Hoisting the sail is not mandatory, but it makes things much easier. Exception: if you have chosen the lazy bag standard or essential, since the zipper is not detachable, the mainsail sheet must be released to pass the lazy bag, and refasten it once the lazybag past.
- Secure the lower part of the lazy bag at the boom
2. When your sail has a loose foot:
Slidethe rope of the lazy bagIn the boom groove, starting from the aft mast, enter at the level of the gooseneck. To do this, you need to move forward on the foredeck and then back up with the lazy bag sliding into the groove of the boom.
2 bis. When your sail is reefed into the boom:
Slide in all at once,the sail's bolt ropeThat youtightenIn the lower part of the lazy bag which is made of PVC in the groove of the boom.
This step 2 allows you to secure the lower part of the lazy bag to the boom.
3. The lazy bag is opened in two, one panel on port side and the other panel on starboard side.
4. Slide the batten into the port-side sleeve designed for this purpose, secure the batten by closing the Velcro flap. Repeat the same on the starboard side.
- Attach the lazy jacks
5. Attach the strand of each lazyjack To the strap loop provided for this purpose with a bowline knot. Repeat the operation as many times as there are lazy jacks. The average is 3 pairs, but 4 pairs are also quite common on boats over 40 feet.
Please note that we sell the lazy jack kit to assemble yourself
- Adjust the lazy bag
6. Adjust and Secure lazy bag at the back of the boom with a line on the designated waiting loops
7. Reattach the reefing bumps
8. Lower the sail
9. Adjust the lazy jacks if necessary
And there you have it, the installation of your lazy bag is done, you are ready to sail.